Paperless transfer dockets are assigned to the paperless queue waiting to be assigned to a picker. When a docket is assigned to a picker, the docket can only be downloaded by PDAs that have that user logged in.
Follow this procedure to assign a transfer docket to a picker, or to change the picker to whom a transfer docket is assigned.
To assign a transfer docket to a picker:
Refer to "Displaying the Warehouse Scheduler".
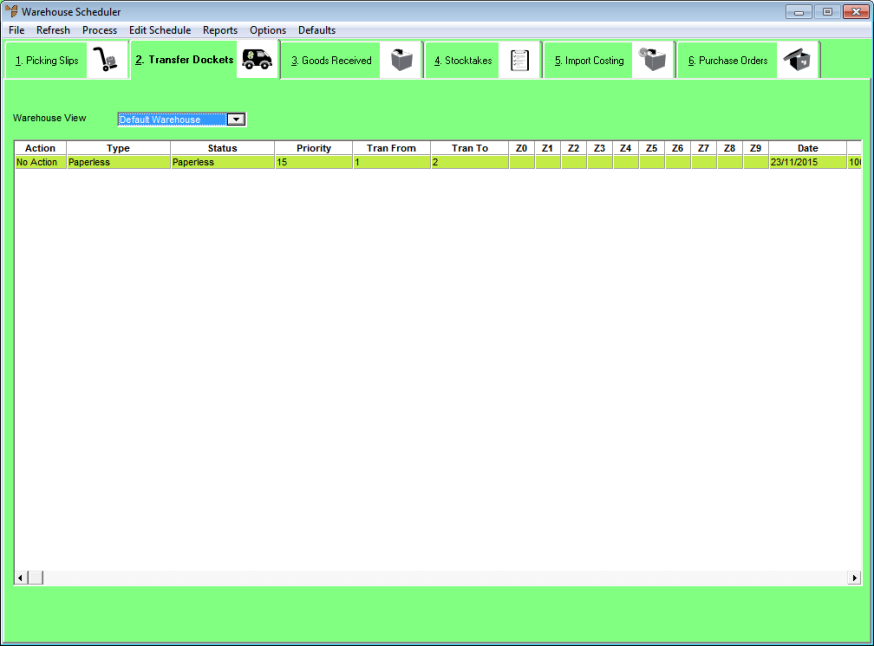
Micronet displays the Warehouse Scheduler - Transfer Dockets tab.

2.8 Feature
For more information about the fields on this tab, refer to "Viewing or Changing the Status of a Transfer Docket".
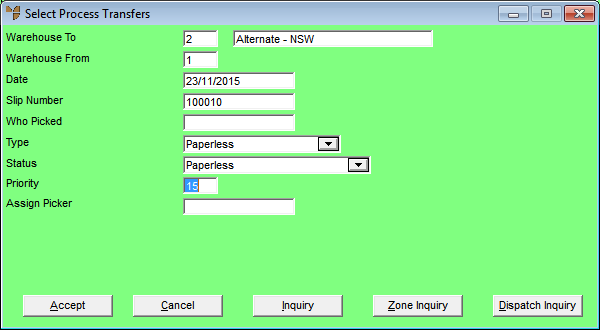
Micronet displays the Select Process Transfers screen.

You can also press spacebar then Enter to select a picker. If you are changing the picker, the original picker is still displayed in the Who Picked field but entering a new picker will update the picker.
|
|
|
Technical Tip You cannot change any other fields on this screen. |
Micronet redisplays the Warehouse Scheduler - Transfer Dockets tab with the Status changed to Assigned to Picker.
|
|
|
Technical Tip This screen is not automatically updated. It is a good idea to select FILE | REFRESH every now and then to ensure you are viewing the most recent data. |